Appearance Settings
There is two way to access the Appearance Settings:
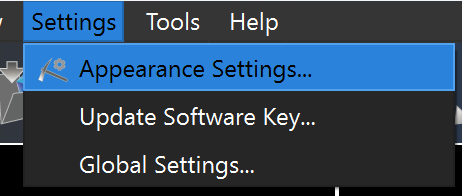
In the Top Menu, click on Settings and then select Appearance Settings.
In the Toolbar, click on the Appearance Settings icon
 .
.
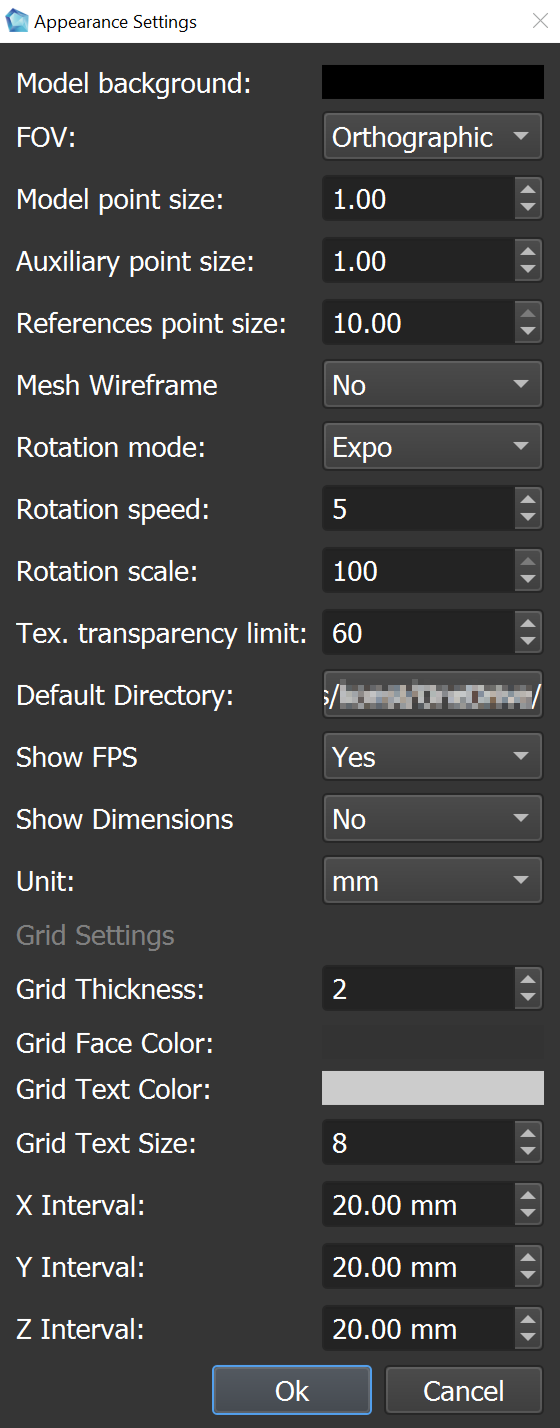
Below are the adjustable options:
Model background: Choose the background color for the model viewer.
FOV (Field of View): Toggle between perspective or orthographic views for the 3D model.
Orthographic View: This view shows the model without perspective distortion, meaning objects will appear the same size regardless of their distance from the camera. It's useful for precise measurements and analysis, as it eliminates any changes in scale caused by depth.
Perspective View: In this view, objects closer to the camera appear larger, while those further away appear smaller, creating a more realistic sense of depth. However, it introduces perspective distortion, which mimics how we perceive the real world.
Model point size: Modify the size of the points representing defects.
Auxiliary point size: Set the size of points for any auxiliary elements in the model.
References point size: Change the point size for reference elements added on the model.
Mesh Wireframe: Enable or disable the mesh wireframe overlay on the 3D model.
Rotation mode: Choose rotation mode between Expo and Standard.
Rotation speed: Set how fast the model rotates when the automatic rotation option is enabled.
Rotation scale: Between 0 and 100, if set to 0, the model will rotate only around the Z-axis, while 100 allows rotation around all axes equally.
Texture Transparency Limit: Adjusts the minimum opacity level applied to textures during rotation. This setting is only effective for samples with textures.
Default Directory: Specify the default folder on your device. The location will store files, such as screenshots and other outputs.
Show FPS: Toggle the display of frames per second in the model window (Yes/No).
Show Dimensions: Enable or disable the display of model dimensions (Yes/No).
Unit: Select the measurement unit (millimeters or another system).
Note
If "Show FPS" is selected, the frame rate will be displayed in the upper-right corner of the main view. This indicates how efficiently your computer is rendering the model. For optimal performance, the FPS should ideally be above 20, which reflects smooth rendering on a capable system.
Grid Thickness: Adjust the line thickness of the grid.
Grid Face Color: Choose the color of the grid lines.
Grid Text Color: Set the color for the grid labels.
Grid Text Size: Modify the font size for the grid labels.
X Interval: Set the spacing between grid lines on the X-axis.
Y Interval: Set the spacing between grid lines on the Y-axis.
Z Interval: Set the spacing between grid lines on the Z-axis.
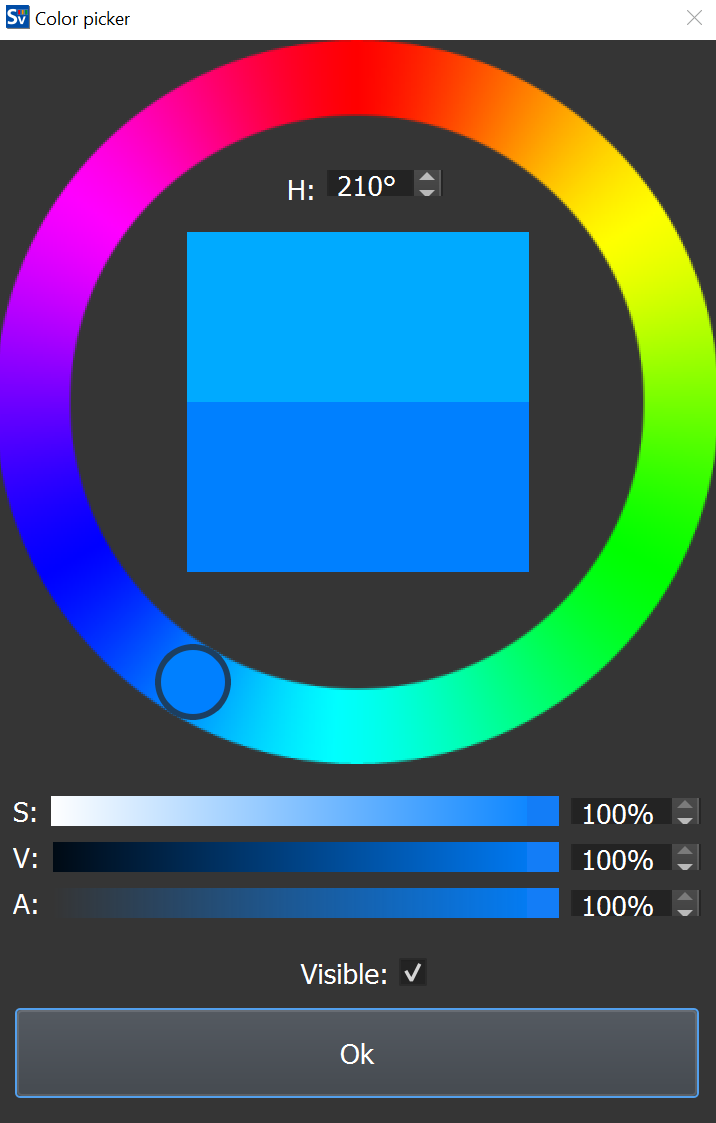
Color picker
For every object in Yield-Pro, you can choose a color using the color picker. The color picker allows you to select a color with HSVA (hue, saturation, value, alpha) values:
Hue: Represents the color type, ranging from 0 to 360 degrees on the color wheel.
Saturation: Indicates the intensity of the color, from 0% (gray) to 100% (full color).
Value: Represents the brightness of the color, from 0% (black) to 100% (full brightness).
Alpha: Controls the transparency of the color, from 0% (completely transparent) to 100% (completely opaque).
Tip
Open the color picker by double-clicking on the color box next to the object.
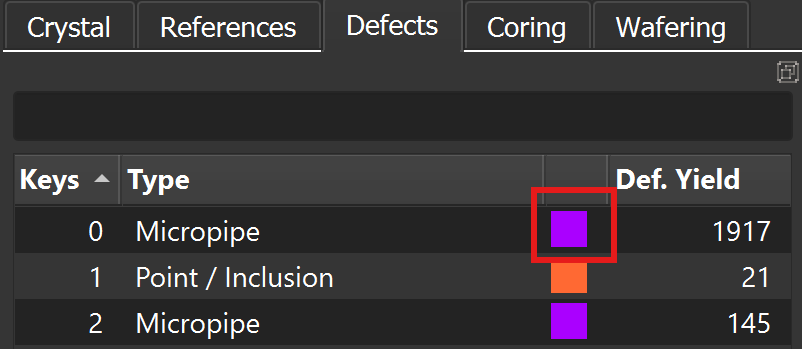
Example for an defect, but the same applies to all objects in Yield-Pro: