Top Menu Overview

The Top Menu provides easy access to essential tools and settings, many of which are also available through the symbol menu below for quicker access. Here’s what you can find in each section:
File
The File submenu includes options to open models and folders, similar to the buttons/icons in the Toolbar. For convenience, some of these functions are also available in the Toolbar below the top menu.
Read the chapter with in-detail explanations about options for Opening Model relating to these functions( fix link):
Open Containing Folder: Opens the folder where the currently active model file is stored on your computer.
Open Recent: Provides quick access to a list of recently opened models.
Open Demo Models: Take a look at the sample models provided by Scientific Visual for demonstration or practice.
And read more about the following in the Toolbar table (fix link):
Open Model: Opens a specific model file from your computer’s storage.
Open Folder: Allows you to open a folder containing multiple scan files.
Save Model: Saves the current model and any modifications made.
Save Model As: Saves the current model under a new name or in a different location.
Export Model as SVCM: Exports the current model as a 3D SVCM file for further use or sharing.
Share Model by Email: Allows you to directly send the current model via email from the software.
Close Model: Closes the current model, but keeps the software running.
Quit: Closes the software entirely, exiting the program.

View
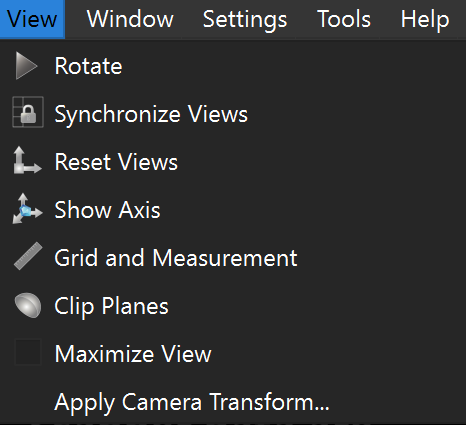
The View menu allows you to control how you see your model. Most of these options are duplicated in the Symbol menu for quick access:
Rotate: Rotate the model to explore from different angles.
Synchronize Views: Sync multiple views of the model.
Reset Views: Return the model view to its original position.
Show Axis, Grid, and Measurement: Toggle these visual aids on or off.
Clip Planes: Adjust viewable sections of the model by clipping planes.
Maximize View: Expand the current view to full screen, hiding all menus and toolbars for demonstration purposes.
Apply Camera Transform: Apply the current camera angle and position to all views for a consistent perspective.
Window
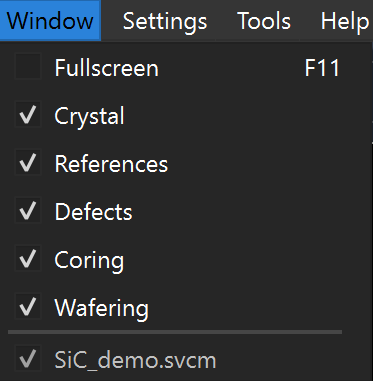
Use the Window menu to:
Switch to fullscreen mode (shortcut: F11).
Show or hide tabs in the software, including Crystal, References, Defects, Coring, and Wafering. More about Tabs on page xxxx (fix link)
Settings
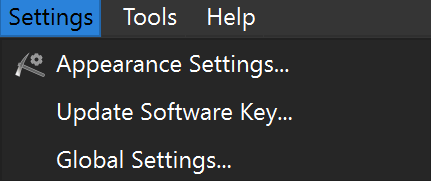
The Settings menu allows you to adjust how the software looks and functions.
Appearance Settings: Customize how the model itself is displayed, such as colors and lighting.(fix link to more abt appearance_settings)
Update Software Key: Enter your license key here to get the latest software updates.
Global Settings: Adjust general software settings. Use the drop-down menus to make changes to each setting:
Languages: Switch the software interface to English, French, German, or Chinese (Simplified).
Theme: Select between dark or light mode.
Preferred View: Choose which view will appear as the main window (the largest view).

|

|
Create Log Files: Generates system logs for troubleshooting or review.
Check for Updates: Use to see if a new version of the software is available for download.
Respect Model Settings: This option ensures the software retains the settings of the last model used, instead of applying default overrides. When enabled, Yield will remember and apply those specific settings the next time the model is opened.
Show Messages on Startup: If the model status is ‘Compressed’, it will show a message informing about it. Read more about model status in [fix link to the section about model compression].
PDF Report Mode: After wafers are created, use this feature to generate a detailed report in PDF format, summarizing the key data and visualizations related to the wafering process.
Tools
Compress Model: Simplifies the model by grouping objects and defects for faster processing and display.
Note
In Yield, each model has a hidden parameter: Model Status. It can either be ‘Original’ or ‘Compressed’. If the model has ‘Original’ status, all defects are independent, meaning that they are presented as separate defects in the Defects Tab. Each defect has its local properties, like Defect Size (the distance between the farthest points of the defect) and Position XYZ (the position of the center of mass). If the model status is ‘Compressed’, it means that, based on their sizes or defect types, some defects were combined into one defect.
Pros: Improved model processing and display speed.
Cons: Loss of local properties of individual defects.
Export Objects: Allows you to export individual cores, wafers, or crystal splits as separate files.
Screenshot: Captures the current view of the model and saves it as an image file (in the directory of your choice).
Generate Report: This feature creates a detailed report based on the settings configured previously. The report includes information about the morphology of defects (defect types), defect probability within each wafer, and a comprehensive summary of the model’s overall quality and production yield potential. Users can adjust the report parameters to focus on specific elements like defect clusters or yield optimization. . Read more about generate report in Yield here (link).
Show G-code: This option opens a window displaying the G-code for the current model and cutting configuration. Read more about g-code in Yield here (link).
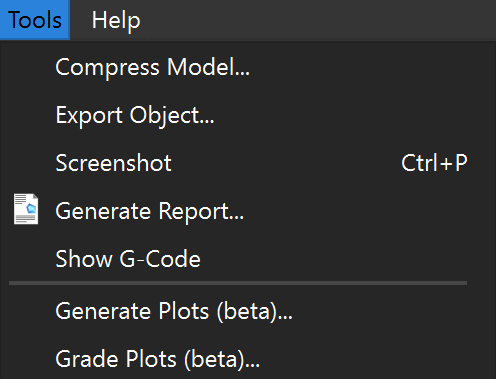
Generate Plots
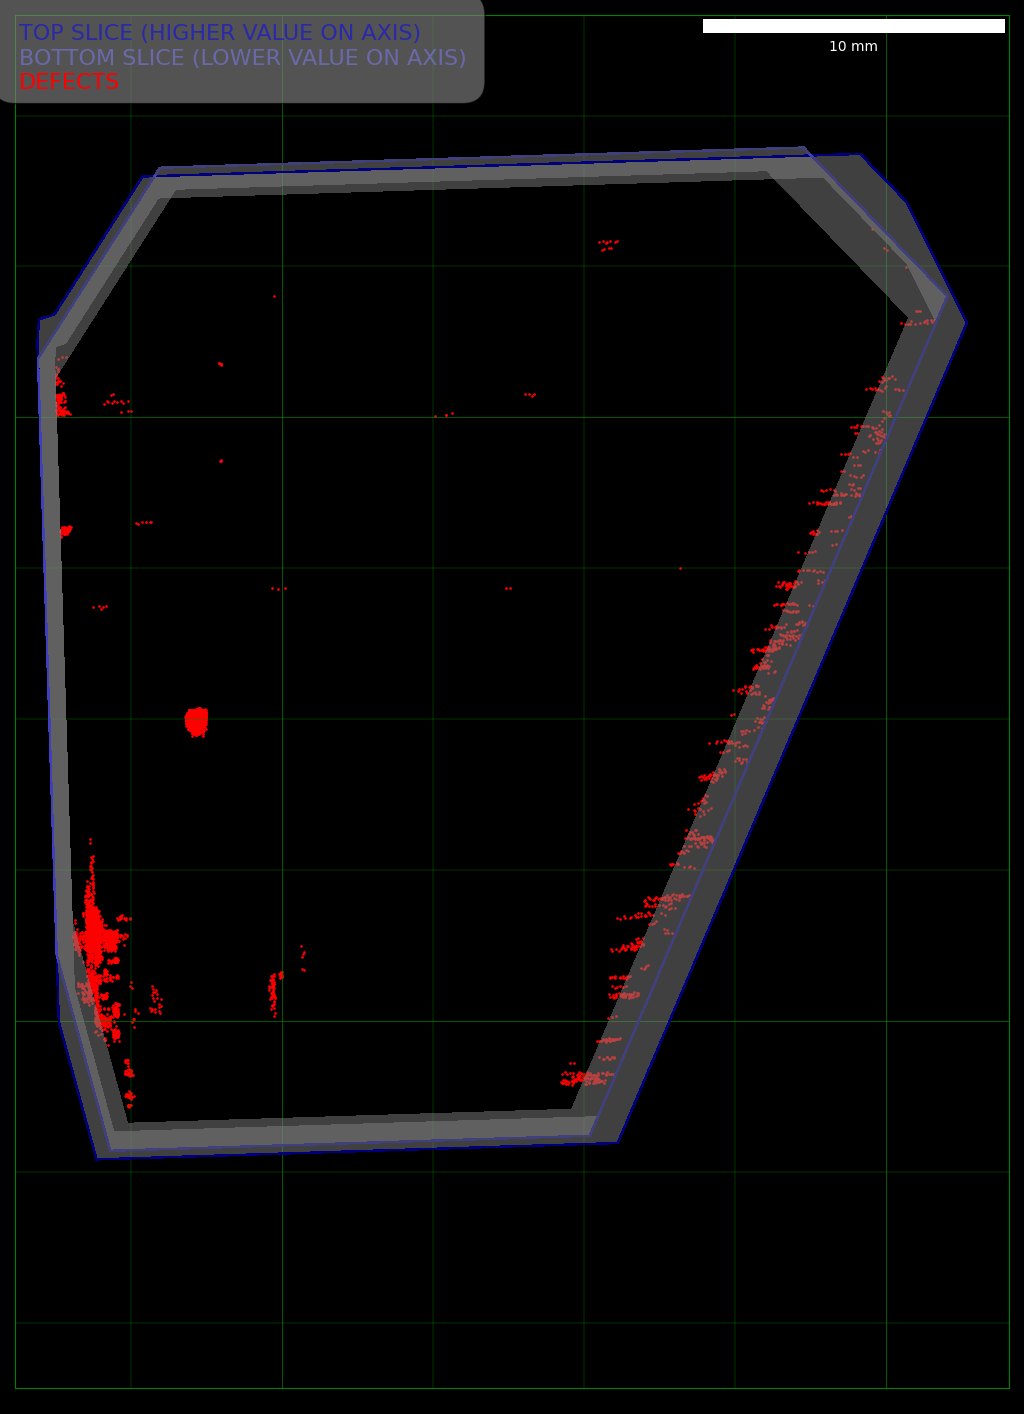
Step 1: A pop-up window will appear where you can select the types of plots to export and choose the directory for saving them. The user can decide to include detailed images of each slice, showing all defects.
Step 2: The selected folder will contain individual images (slices) that visually represent each cross-section of the model with all defects marked.
The result of this process is the set of images, called ‘pre-processed plots’ (black background)
Pre-processed plots: These contain defects, along with the top and bottom slices of the crystal. These slices display differences in shape or size to confirm that the desired cutting plan avoids impacting the outer crystal edges.
Grade Plots
A saved folder containing the generated & graded plots with two key types of images.
Graded plots: These show planned cutting paths (in square or rectangular shapes) to optimize wafering or coring.

|

|
Plots Key:
Each plot contains a key, located on the top for black images and on the bottom for white images.
Pre-processed plots:
Red: Marks the defects present in the slice.
Dark Blue: Outlines the top slice border.
Light Blue: Represents the bottom of the slice.
Graded plots:
Solid Line: Represents the top of the slice.
Dashed Line: Represents the bottom of the slice.
Items on plots:
White: Defect-free items.
Green: the defect lies on the border of an item
Brown: 1 defect.
Maroon: 2-3 defects.
Purple: Items with defects, labeled as ‘bad’.
Light Purple: ‘Out-of-area’ items, meaning part of them lies outside or too close to the crystal’s border.
Note
The Light Purple color also indicates that if the offset value is changed, the item could still be utilized.
Help
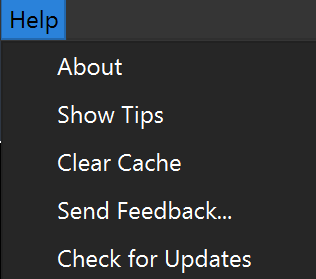
The Help menu provides tools for navigating and improving your experience.
About: Opens a new window displaying the current Yield version, license key, and revision number. You can also access the user agreement and, if you’ve misplaced your license key, find it in this section.

Show Tips: Opens a list of keyboard shortcuts. You can check the box for “Show on Startup” if you want to see these tips every time the software opens.
Clear Cache: Removes temporary data stored by the software, improving performance and freeing up memory for future tasks.
Send Feedback: Opens a window where you can report issues or submit feedback.
Check for Updates: Searches for and installs the latest version of the software, ensuring that you have access to the most current features and bug fixes.
