Smart Wafering
Smart Wafering Process
What is Smart Wafering?
Smart Wafering lets you optimize the number of wafers you can create from a crystal by fine-tuning key settings that affect yield and quality. By adjusting these parameters, you can maximize efficiency, reduce defects, and get the most out of your materials.
Watch the Smart Wafering video demonstration on the ScientificVisual website: https://scientificvisual.ch/
Start the Smart Wafering Process
### Select and Upload the Scan File
If necessary, select and upload the desired scan file to the system. After the scan file is uploaded and visible in the central window, find the toolbar on the right side of the scan image. The Crystal tab should be displayed there. From the Crystal tab, navigate to the Wafering tab by clicking on it in the toolbar’s head menu. (See Images 1 & 2)
Note
Refer to Section X for detailed instructions on File Upload.
### Change the Wafering Mode
Locate the Mode button situated on the right side of the screen in the Wafering tab.
Click the Mode button to open the drop-down menu.
From the drop-down menu, select the SmartWafer mode. (See Images 3 & 4)

Configure Smart Wafering Settings
### Why adjust these settings?
Fine-tuning these settings helps you control the cutting process, allowing you to produce the highest quality wafers with minimal defects. Set the following values for your computation:
Precision: Refers to the accuracy and fineness of the cutting tool’s performance.
Thickness: Input the desired thickness of the wafers in either whole numbers or decimals.
Gap: Specify the spacing between individual wafers, using whole numbers or decimals.
Defects: Click this parameter to open the drop-down menu. Then choose whether to consider All or Only Visible ones during the computation.
Note
Upon selecting the SmartWafer mode, the Core setting will automatically be set to Default. Refer to Section X for further explanations and specifics about Core.
Compute Wafer Yield
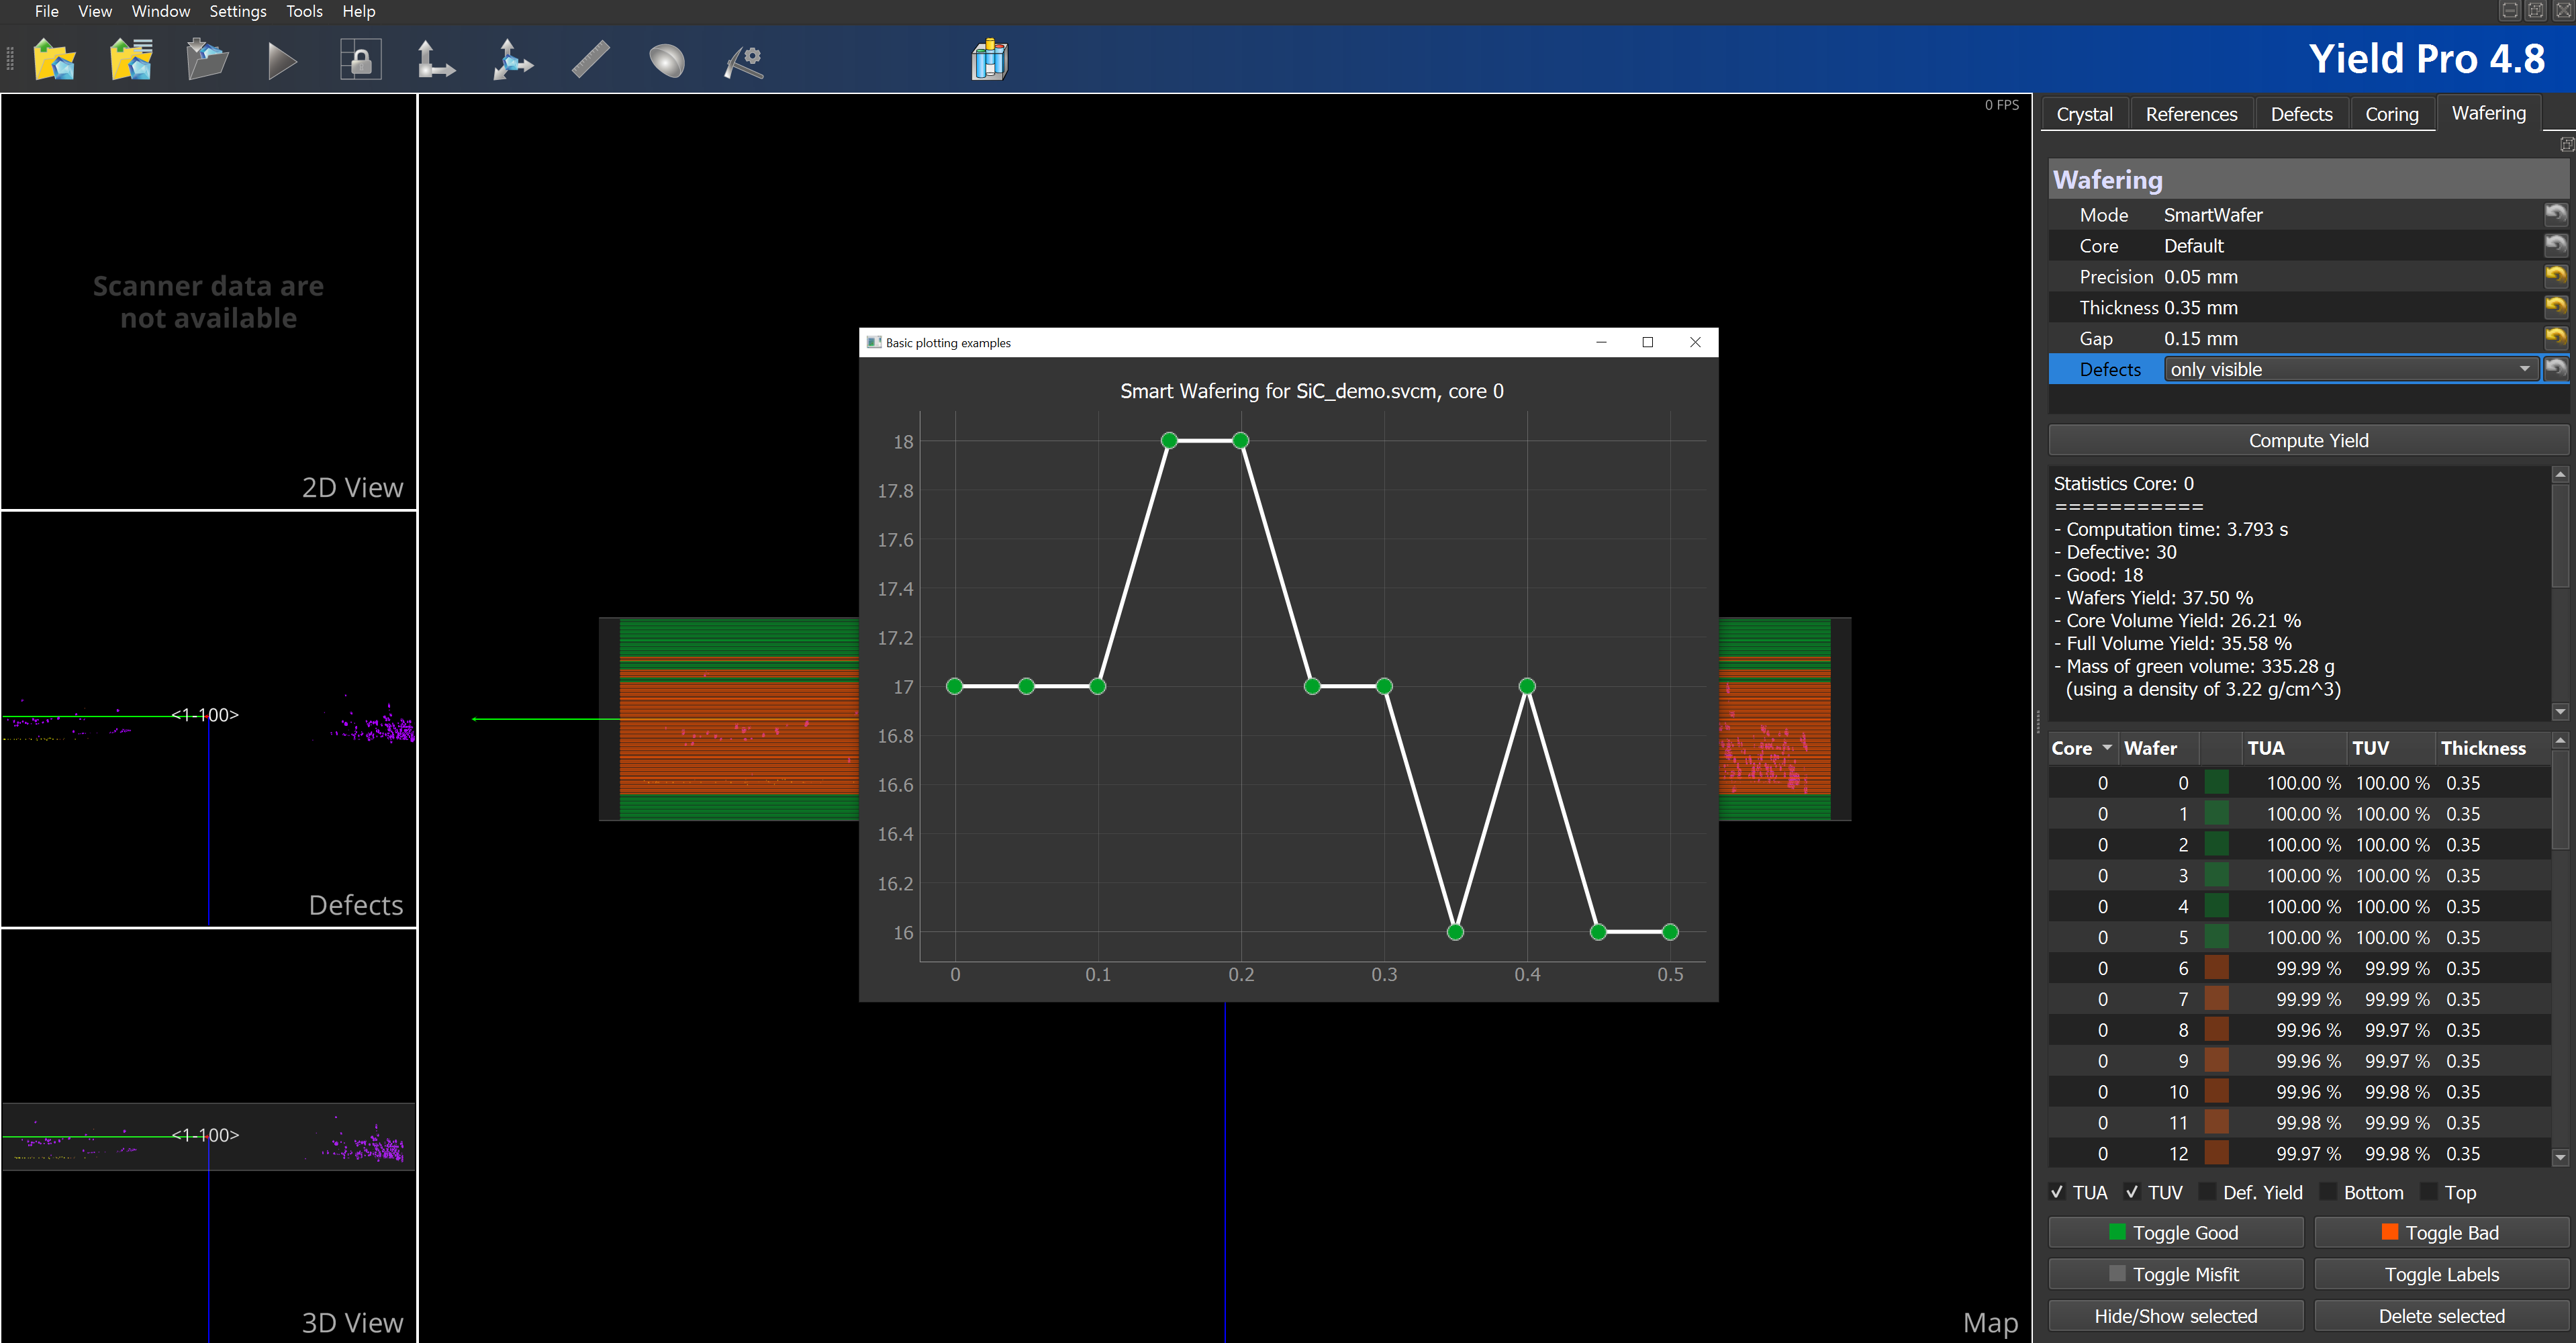
This gives you insight into how many usable wafers you can produce based on the settings you’ve configured. This step helps you visualize the impact of your choices and make adjustments to maximize yield. After setting all your parameters, select the Compute Yield button below. A loading dialog box will appear, showing that the system is processing the computation. When the computation is complete, a new window displaying basic plotting examples will be presented. (See Image 5)
Note
Similar to the Wafer mode, detailed calculation data, including the number of defective and good wafers, as well as information for the cutting machine, will be displayed on the right-hand side under the Compute Yield button. This data can be easily exported for further analysis or use during the cutting process.

Read the Graph
The Graph helps to understand the relationship between your selected settings and the resulting wafer yield. The graph shows how changing parameters affects the number of good wafers you can produce. Use it to adjust your settings and improve your results.
The X-axis (horizontal) shows the core offset in the sawing system.
The Y-axis (vertical) shows how many wafers will be produced.
### Adjust Graph Settings
Adjust the Graph Settings to refine and review the metrics shown in the graph. This makes it easier to understand the results and improve your wafer production process. The graph parameters menu is opened by clicking on the graph, allowing for adjustment and review of key metrics.
Detailed Wafer Information
Viewing Detailed Wafer Information gives you a breakdown of each wafer, including key parameters and potential yield. This section lets you sort and review individual wafers to ensure they meet your production standards. In this section, each potential wafer is individually listed and numbered. (See Image 6)
Key parameters such as TUA, TUV, Thickness*, and more are displayed for each wafer.
You can sort the wafers manually or click the column headers to arrange them according to your preference and the selected criterion.
Note
Refer to Section X for information about Wafer Parameters.
Note
For a better view, you can open the toolbar as a separate, larger window to display more wafers at once. To do this, first find the Wafering tab headline and click the button on the right above it. (See Image 7)